

Cutting velvet printed fabric without fraying is a skill that can significantly enhance the quality of your projects, whether you're a professional tailor, a hobbyist, or someone in the fashion industry. As a supplier of Velvet Printed Fabric, I've witnessed firsthand the challenges that come with working on this luxurious and delicate material. In this blog post, I'll share some valuable tips and techniques to help you achieve clean, fray - free cuts every time.
Understanding Velvet Printed Fabric
Before we delve into the cutting techniques, it's crucial to understand the nature of velvet printed fabric. Velvet is a plush, pile fabric known for its softness, sheen, and rich texture. The print on the fabric adds an extra layer of visual appeal but also requires careful handling to preserve its integrity during cutting. The pile of the velvet consists of densely packed fibers that can easily unravel if not cut properly, leading to fraying and a less - than - perfect finish.
Tools You'll Need
To cut velvet printed fabric without fraying, having the right tools is essential. Here are some items you should have on hand:
- Sharp Scissors: Invest in a pair of high - quality, sharp fabric scissors. Dull scissors can crush the fabric fibers instead of cutting them cleanly, increasing the risk of fraying. For velvet, it's best to use scissors with a fine, pointed tip to make precise cuts.
- Rotary Cutter and Mat: A rotary cutter can be a great alternative to scissors, especially for straight cuts. The sharp, circular blade slices through the fabric smoothly, reducing the chances of fraying. Use a self - healing cutting mat to protect your work surface and ensure accurate cuts.
- Seam Ripper: In case you make a mistake or need to adjust a cut, a seam ripper is a handy tool. It allows you to carefully remove stitches or cut through unwanted fabric sections without damaging the surrounding area.
- Pins and Pattern Weights: Pins are useful for holding the pattern in place on the fabric, but be careful not to pierce the velvet too deeply, as it can leave visible holes. Pattern weights can be a great alternative, as they hold the pattern firmly without puncturing the fabric.
Preparing the Fabric
Proper fabric preparation is key to achieving fray - free cuts. Here's what you need to do:
- Wash and Dry (if necessary): If your velvet printed fabric has any sizing or chemicals on it, washing and drying it before cutting can help remove them. However, be sure to follow the care instructions on the fabric label, as some velvets may shrink or lose their shape when washed.
- Press the Fabric: Use a low - heat iron and a pressing cloth to gently press the fabric. Avoid pressing directly on the print, as it may damage the ink. Pressing helps to smooth out any wrinkles and makes it easier to lay out the pattern accurately.
- Lay Out the Pattern: Place the pattern on the fabric, following the grainline if indicated. Make sure the pattern is centered and aligned correctly. Use pins or pattern weights to secure the pattern in place.
Cutting Techniques
Now that you have the right tools and the fabric is prepared, it's time to start cutting. Here are some techniques to minimize fraying:
- Cut on the Fold: If possible, cut the fabric on the fold. This reduces the number of raw edges that are exposed, minimizing the risk of fraying. When cutting on the fold, make sure the pattern is aligned symmetrically on both sides of the fold.
- Cut Slowly and Steadily: Take your time when cutting the fabric. A slow, steady cut allows the scissors or rotary cutter to cleanly slice through the fibers without pulling or stretching them. Avoid rushing or making jerky movements, as this can cause fraying.
- Use a Cutting Guide: For straight cuts, you can use a ruler or a cutting guide to ensure accuracy. Place the guide along the edge of the pattern and run the scissors or rotary cutter along it. This helps to keep the cut straight and reduces the chances of fraying.
- Finish the Edges Immediately: After cutting, it's important to finish the edges to prevent fraying. There are several methods you can use:
- Overcasting: Use a sewing machine or a hand - sewing technique to overcast the raw edges. This involves stitching a zig - zag or a narrow overcast stitch along the edge of the fabric to secure the fibers.
- Fusing an Edge Binding: There are special edge bindings available that can be fused to the raw edges of the fabric using an iron. This creates a clean, finished edge that prevents fraying.
- Using a Serger: A serger is a specialized sewing machine that can simultaneously cut and finish the edges of the fabric. It trims the excess fabric and sews a neat, overlocked stitch along the edge, preventing fraying.
Special Considerations for Printed Velvet
When working with printed velvet, there are a few additional things to keep in mind:
- Match the Print: If your pattern requires multiple pieces of fabric, make sure to match the print on each piece. This will give your project a professional and cohesive look. When cutting, pay close attention to the alignment of the print on the fabric.
- Avoid Cutting Through the Print: Try to cut around the print as much as possible, especially if it's a detailed or important part of the design. Cutting through the print can damage it and make the finished project look less appealing.
Related Fabrics and Their Applications
In addition to velvet printed fabric, we also offer a range of other high - quality fabrics. For example, Hot Gold Leather Fabric is a unique and stylish option for creating statement pieces. Its metallic finish adds a touch of glamour to any project, whether it's a handbag, a jacket, or a pair of shoes.
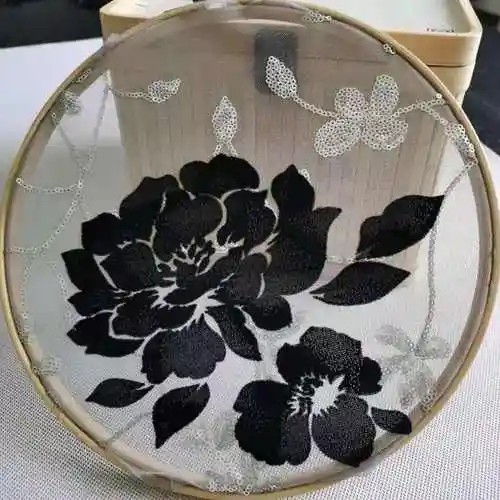
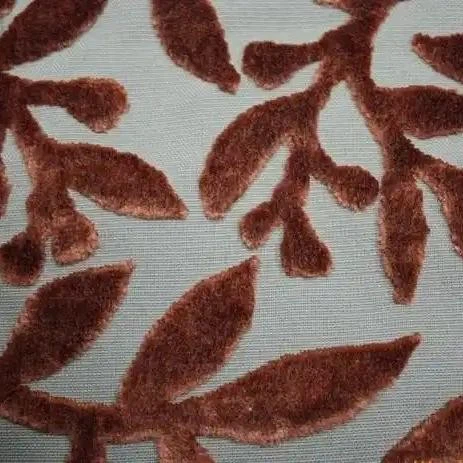
Flocked Fabric is another interesting choice. It has a soft, velvety texture with a raised pattern, making it ideal for adding a luxurious touch to home decor items such as cushions, curtains, or wall hangings.
Hot Gold Woven Fabric combines the durability of a woven fabric with the eye - catching appeal of a metallic finish. It can be used for a variety of applications, including clothing, accessories, and upholstery.
Conclusion
Cutting velvet printed fabric without fraying may seem like a daunting task, but with the right tools, techniques, and a little practice, you can achieve professional - looking results. Remember to prepare the fabric properly, use sharp tools, cut slowly and steadily, and finish the edges immediately to prevent fraying. By following these tips, you'll be able to work with velvet printed fabric with confidence and create beautiful, long - lasting projects.
If you're interested in purchasing our Velvet Printed Fabric or any of our other high - quality fabrics, we invite you to get in touch with us for a purchase negotiation. Our team of experts is ready to assist you in finding the perfect fabric for your needs.
References
- Textile Institute. "Handbook of Textile Fibre Structure." Woodhead Publishing, 2011.
- Pribyl, Linda. "Fabric Savvy: The Ultimate Guide to Choosing and Using Fabric." Potter Style, 2009.